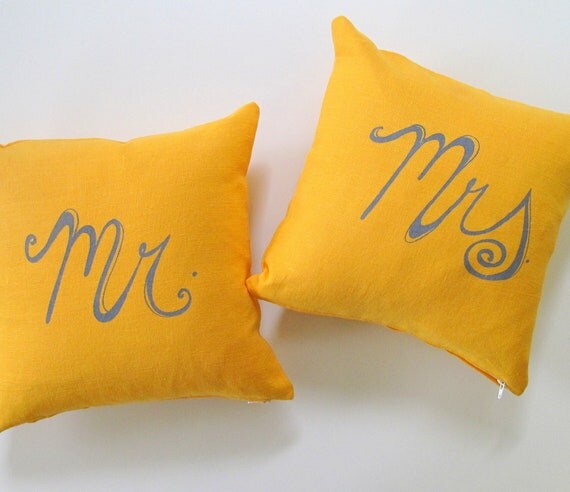
If you are a regular Etsy or Pinterest cruiser like myself, you might have seen those adorable Mr. and Mrs. pillows cross your screen a few times. I fell in love with the Mr. and Mrs. Pillow Covers offered up by SweetnatureDesigns on Etsy. Unfortunately, these adorable decorative covers were a little out of my price range. I became determined to make my own as a Valentine's Day present for R.J.
That's when I ran across a tutorial while searching on Pinterest posted by Kait over at Mrs. DIY and the Tennis Guy. I didn't follow her wonderful tutorial verbatim, but it served as the basis for my project. Didn't hers turn out great?!
 |
| Photo courtesy of Mrs. DIY and the Tennis Guy |
Aren't you dying to tackle your own now? Awesome! Here's what you need:
Supplies
One yard of burlap
Permanent acrylic paint
Foam/paint brush
Paint pen
Scissors
Needle and thread
Pillow fluff or forms
Paper to use as a stencil
Step One. Once you've gathered all your supplies, find a font on your word processor that you'd like to use on your pillows. Make the words as big as will fit on your page and print them out!
Step Two. Cut out your words so it creates a stencil like mine below. While you have the scissors in your hand, cut two 12'' x 24'' rectangles out of your burlap!
Step Three. Fold one of your burlap rectangles in half to make a square. Cut the half where you folded so you have two burlap squares. Do the same with the other.
Step Four. Position the stencil in the middle of one of the burlap squares. Trace the stencil with your paint pen. Remove your stencil and paint inside the lines with your brush! [Note: If you want clean lines, I'd suggest using a small paint brush. I used a foam brush and didn't get perfectly clean lines. However, I kinda liked it that way!]
Step Five. Let the paint dry completely. Now, lay one of your blank burlap square on top of your painted word. Sew three of your pillow sides. Turn it inside out and stuff your pillow. Sew it all the way up! Repeat for other pillow. Ta-da!
Step Six. Fluff your pillow. [Punching the pillow is highly recommended.] Make up your bed and place your pillows! Then, take a picture and post it on Facebook, Twitter and Instagram! YAY!
I had some leftover fabric. With it, I made an anniversary date pillow the same way as the Mr. and Mrs. pillows.
I really do love how they turned out. I think it gives some character to our boring brown bed. [Husband insists upon solid color comforters only to my dismay.]
Until next time!
Miranda
 |
| Bentley modeling our new pillows! |


No comments:
Post a Comment